However, there were two major components not supplied:
- A method to convert from US power to 100 VAC (Japanese power evidently)
- Diffusion pump cooling system
- A roughing pump
I rigged up a pump I had laying around to cool the diffusion pump and it seems good to go. Eventually I might add a peltier cooler but for now I'll just use a big water tank that should stay cool enough.
I have a roughing pump but the plastic oil watchglass was in pretty poor condition, causing the pump to leak oil. Not only was the gasket torn, but the watchglass was cracked. I ordered new gaskets and machined a new watchglass:
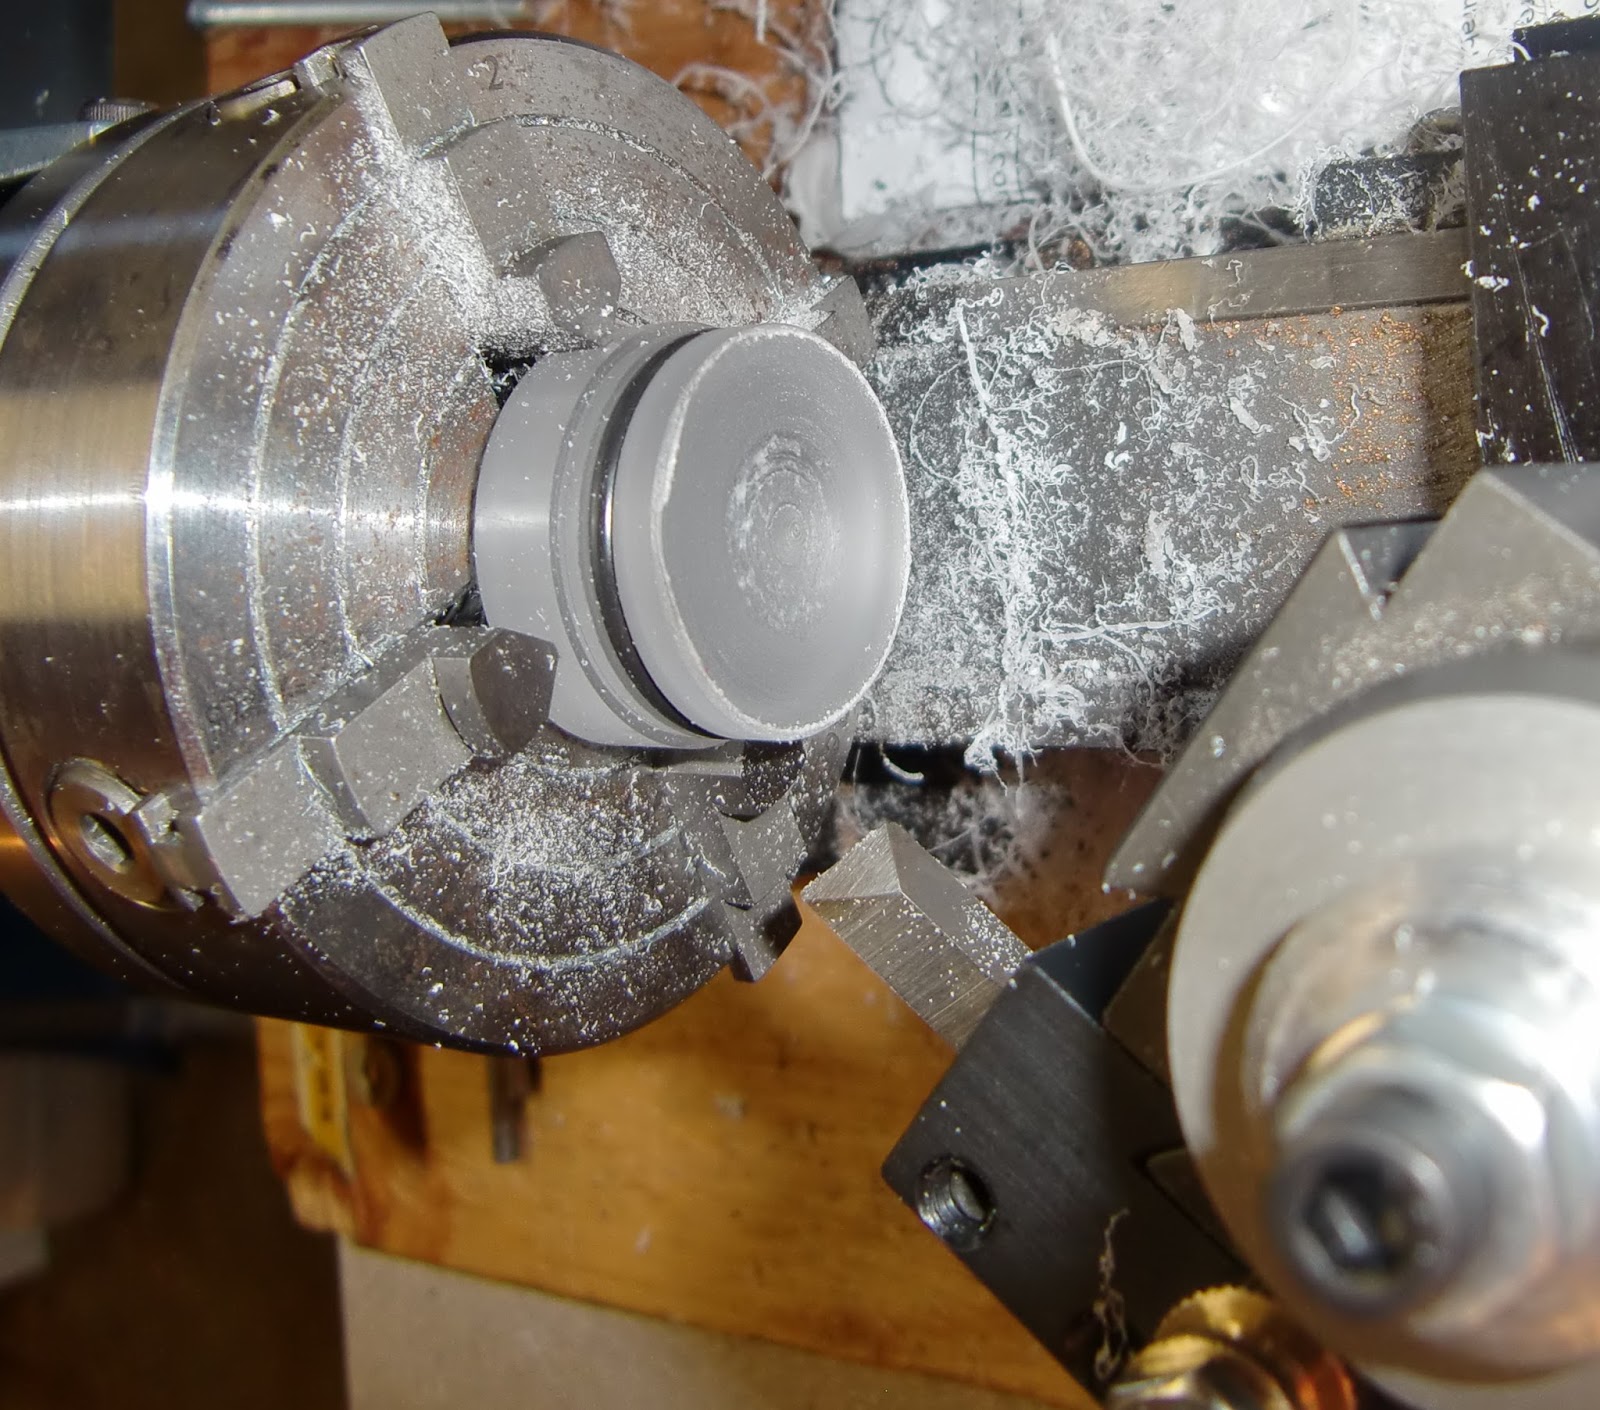
Although, all the dimensions looked pretty good and it fit snugly, it still leaked! At this point I just epoxied the watchglass in place and called it a day. No more leaks!
The Super IIIA has a 1" vacuum hose port and I happened to have a 1" vacuum hose adaptor for my pump. Unfortunately, I didn't have any 1" vacuum hose to join the two. There was a small bit of hose that had been cut off from the original pump that was just enough to join the two together:

(not vacuum hose on the left but gives you the idea). However, its short enough that its fragile and so I ordered some reinforced 1" hose to replace it.
Time to plug it in and see what happens. Here is the startup panel:
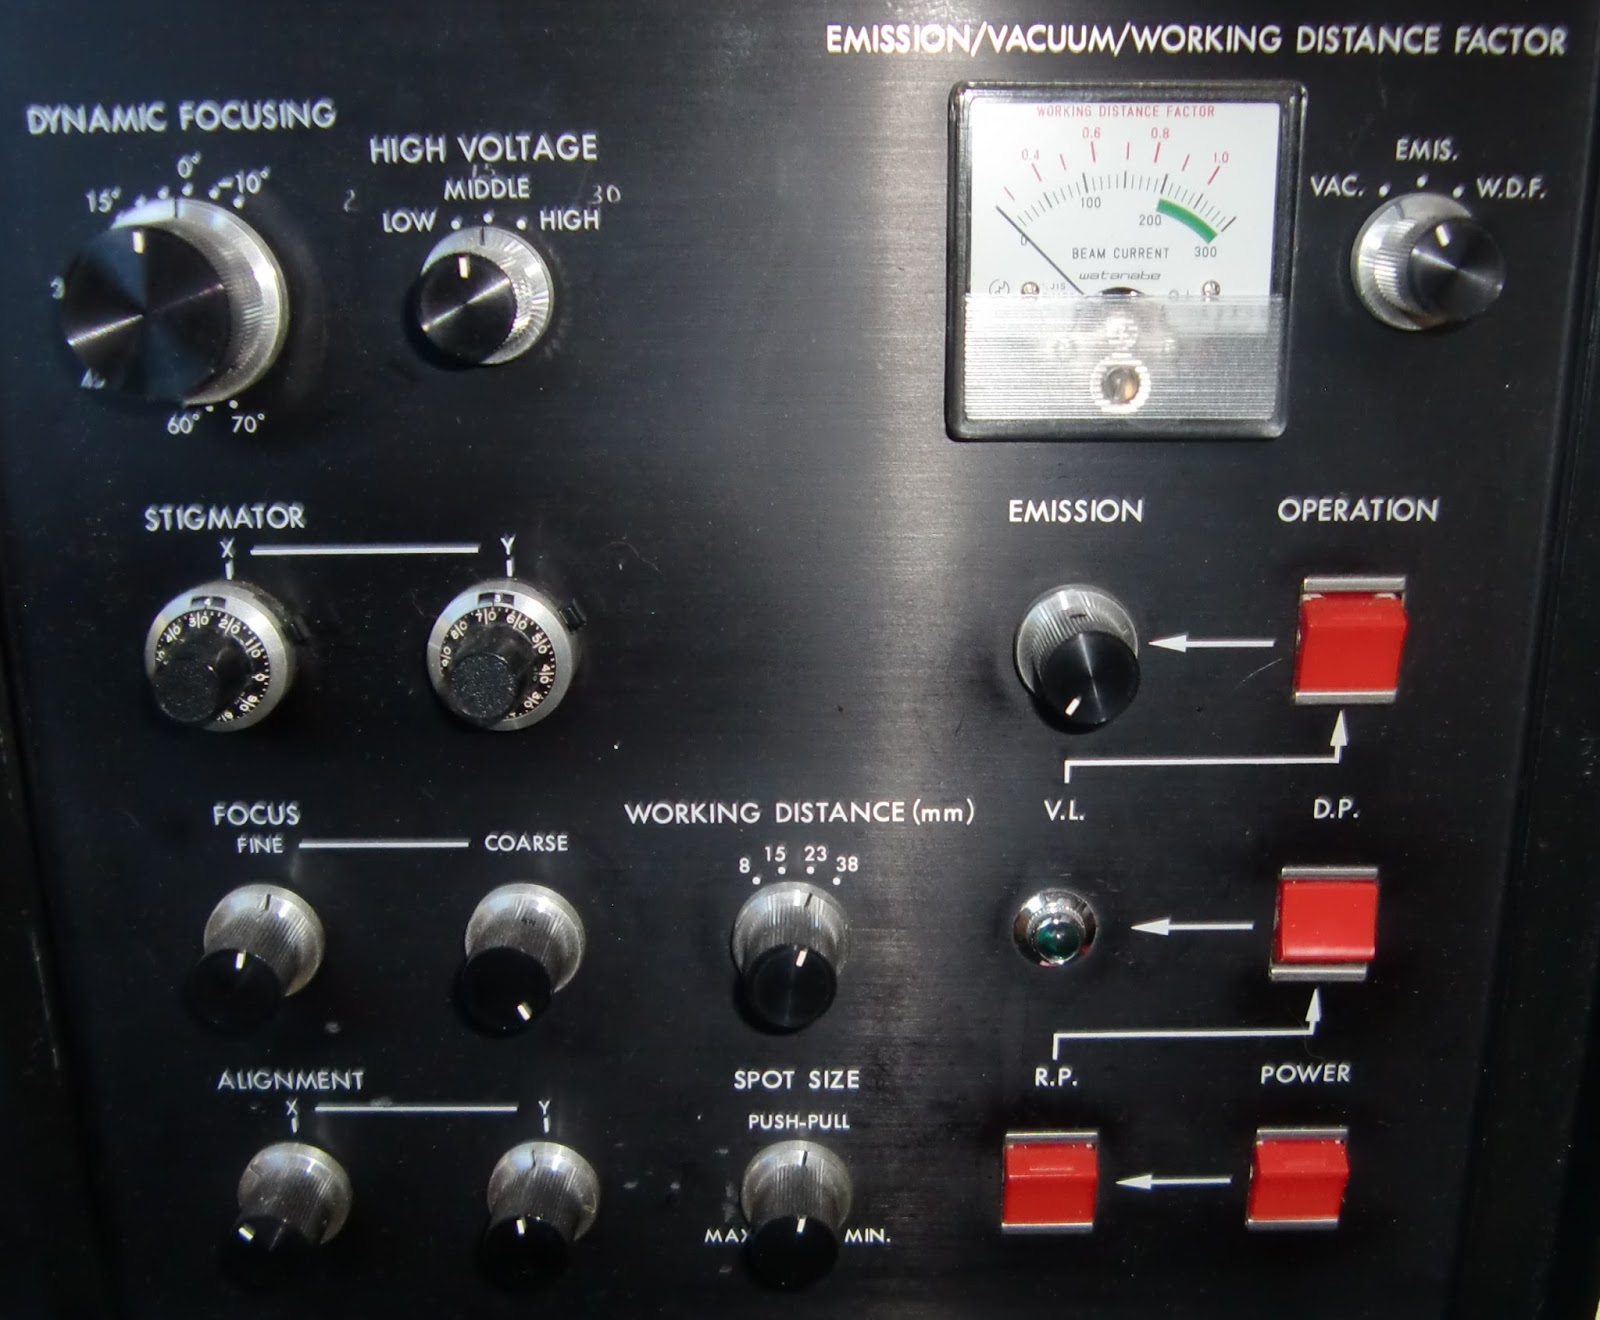
First, I pressed the power button and I think a pilot light came on. No other signs of life yet. I then pressed the RP button and some fans whirred on (probably for pressure measurement). As my roughing pump takes 120V I did not wire it to the 100V RP output and so manually switched it on.
I let the pump run for a bit to evacuate the piping leading up to the chamber. Although I didn't have a pressure gauge on, the pump eventually got very quiet with no burping to indicate any substantial vacuum leaks. Then, I pressed the button to evacuate the chamber. Pump got noisy again as it started to bring down the chamber. But stayed noisy: it leaked bad :(
Next disassembled easily accessible areas so that I could clean it and grease gaskets. One interesting bit that it exposed:

Part of the beam steering optics right below the Wehnelt. The Wehnelt assembly is also interesting (and filthy!):

Everything around the filament is quite dirty. Lapointe recommended Wenol which seems to have worked well enough. After cleaning with Wenol, components were sonicated in water and then rinsed with IPA. I don't think I'm at high enough vacuum where water outgasing will be a problem but I can bake them later worst case.
I imagine these old SEMs are generally not well maintained and without greasing the gaskets, they dry out and develop bad vacuum leaks. This leads to short filament life and subsequently the filament sputtering all other. And burned out for that matter:

Hmm...what to do? Fortunately, there are a number of vendors that sell replacement filaments. I did some research and settled on ME Taylor, the same people that Lapointe bought his filaments from:


They seem fairly simple and I'm hoping I can rebuild them in the future instead of ordering more. Depending on how easily I fix the vacuum leaks, the 10 could last me some time or burn through real quick. So far this is by far the largest purchase I've had to make since I already had the Variac and roughing pump.
After cleaning and greasing, it doesn't leak badly but I still hear some burping, I'm unclear if this is a safe level to use the DP or, more likely, that the DP won't be able to sufficiently lower the vacuum. Next on the agenda is to machine a standard vacuum adapter (probably NW25) for one of the unused chamber ports. This will allow me to attach vacuum gauges to give me a better idea if it actually is leaking badly / in a spot I care. There is a Pirani gauge built into the SEM but its not very accessible.
It came with the schematics which I was able to scan. Also, thanks to lapointe2 I also have the user manual. Both are in fairly crude, disorganized forms as of this writing, but they can be found here along with other info I collect.
